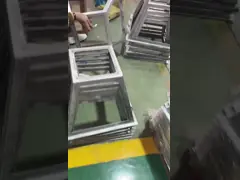
The new solar garden lights are being assembled and are ready for shipment.
Web: www.aweilighting.com
www.brightoutdoorledlights.com
Wechat/WhatsApp: 86-18019093706
How to Install Solar Garden Lights
(Step-by-Step Guide)
Tools & Materials Needed
Solar light components (panel, battery, LED fixture)
Screwdriver, wrench, wire cutter
Concrete mix (for ground-mounted lights)
Level tool
Wire strippers
Installation Steps
Choose the Installation Location
Select a sunny spot with minimal shading (especially between 9 AM–3 PM)
Ensure the area is flat and free from obstructions28
Assemble Components
Attach the solar panel to its bracket using screws
Connect the LED fixture wires to the controller (ensure correct polarity)
Prepare the Base
For ground-mounted lights:
Dig a 1.5m-deep hole (0.8m x 0.8m) and pour concrete for stability
Allow 2–5 days for concrete curing
For wall-mounted lights:
Secure brackets to the wall using screws
Install Solar Panel
Angle the panel toward the south (Northern Hemisphere) or north (Southern Hemisphere)
Ensure no shadows block sunlight
Connect Wiring
Run wires from the solar panel to the battery/controller (use waterproof connectors)
Secure wires in conduits to prevent damage
Mount the Light Fixture
Attach the LED fixture to the pole or wall bracket
Adjust the light angle to cover desired areas
Final Checks
Test the light by exposing the panel to sunlight for 8+ hours, then check nighttime operation
Ensure all connections are tight and weatherproof
Maintenance Tips
Clean solar panels monthly with a soft cloth
Replace batteries every 2–3 years for optimal performance
Adjust panel angle seasonally for better sunlight capture
Garden Light
Courtyard Light
Urban Lamp
Landscape Lighting
Outdoor Lighting
Solar Light
-

Solar And Electricity Powered Garden Light Die-casting Aluminum Courtyard Light With Microprocessor waterproof IP65 Used In Urban Roads
Contact Now -
60W Die-casting Aluminium LED Garden Light Fixtures 5000K DLC Approved Led Outdoor Landscape Lighting
Contact Now -
Die-Casting Aluminum IP66 Waterproof LED Flood Light 70W 100W with CRI 75Ra
Contact Now -
Die-casting Aluminum LED Solar Garden Light Waterproof 230LM/W Park Light Powered By Solar Energy Used In Urban Roads
Contact Now -
Warm White Outdoor LED Flood Lights IP66 Rating Die Casting Aluminum Materials
Contact Now
Related Videos


The Floodlight Business Is Booming Recently And Is Popular In The European Market.
Other Videos
April 07, 2025
IP66 LED Garden Light -Historical Shape Used In Main Urban Roads And Streets
Other Videos
March 29, 2025
The housing of garden lights are being polished...All aluminum products.
Other Videos
April 09, 2025
Watch this before buying Solar LED Light Strips-How to Install LED Light Strips
Other Videos
May 24, 2024